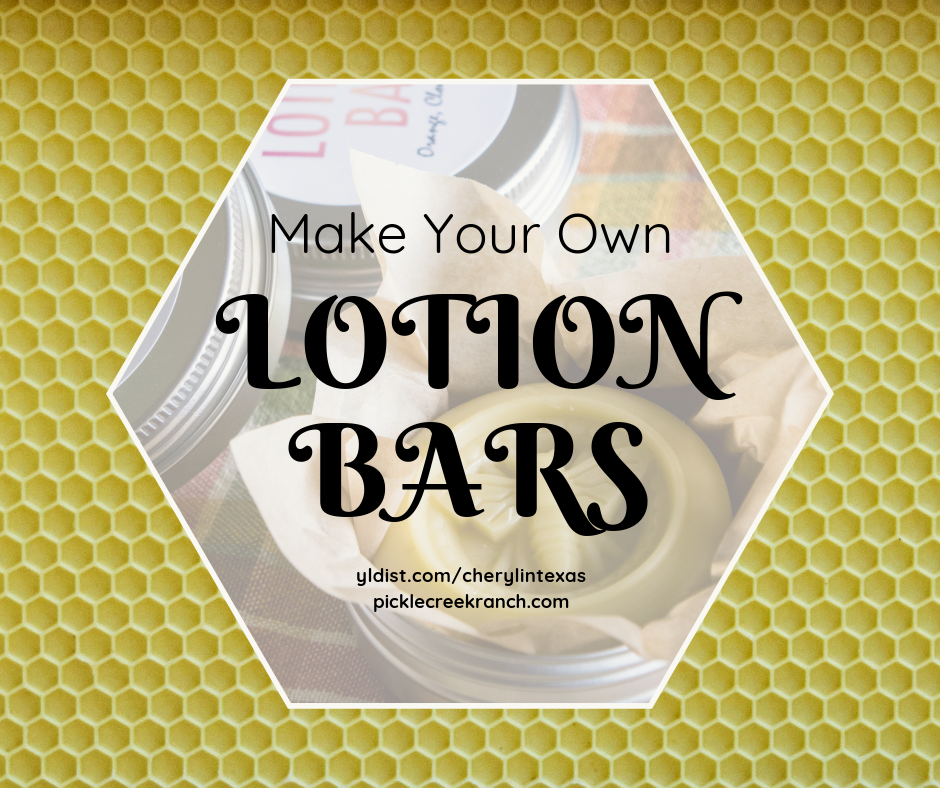
PICKLE CREEK RANCH
  • Home
    • Contact
  • Cheryl In Texas Art
    • Pixels - Art Prints
    • Fine Art America - Art Prints
    • Redbubble - Art Prints
  • Photography
    • Cheryl's PIXELS page
    • Cheryl's FINE ART AMERICA page
    • Cheryl's REDBUBBLE art
  • Essential Oils
    • Nature at its Best
    • Resources
    • Our Founder - D Gary Young
    • Product Line
    • Monthly Promos
    • Young Living News
  • The Ranch
  • Blog

The Blog Page

Communicating about essential oils, nature, photography, chickens and inspirations along the way.


YLEO SIGN UP

MYO Lotion Bars

3/4/2019

2 Comments


MYO Lotion Bars
by Cheryl L. McClure

Picture
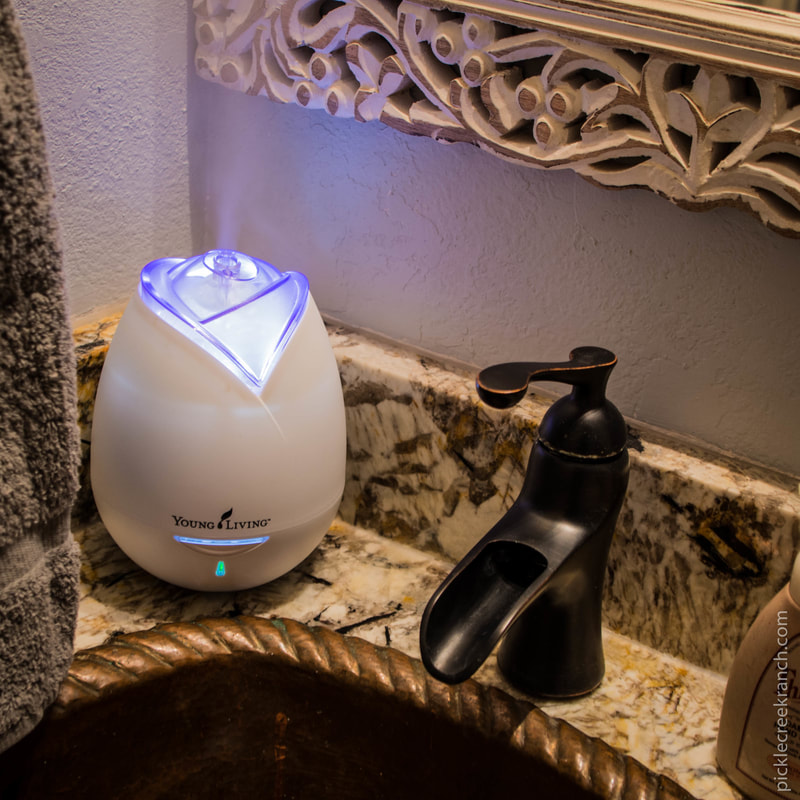
Don't you love the scent of soaps and lotions and essential oils? I do! Before I knew about the hazards of chemicals in fake fragrances and fake scents, I was a number one purchaser of those candles, perfumes and household products that you see all the time at the mall, in ads, on tv and such. Not anymore. I am done with that and choose a healthier alternative that I don't have to question and one that I feel good about exposing my friends and family to, because there is no harm in it. It's all good! At least that's what I aim for. Anyway, fast forward to now and guess what? We'll get to the lotion bars, but first this ...
Picture
We - well, ummm actually, I decided to become a beekeeper last year! And I asked Jan Paul to be my partner and I am so grateful he took me up on it!!

One of the ingredients in my lotion bars contain beeswax that we harvest at our  ranch home, Pecan Branch Ranch. If you don't have bees, you can order beeswax online but be sure and get good clean, organic beeswax with no chemicals. After seeing the price of that, it makes me wonder if I should buy it next time. Haha! It's a lot of work to get a pound of wax when you have a small operation but I know where my beeswax is coming from so I will keep doing this. Plus, our home harvested honey is the BEST and you gotta have honey to get the wax!!
 
The first time we got our bees it was in April; a full hive and a nuk. It's all greek if you don't know about beekeeping, as we learned new terms along the way of this journey. To make a long story short, we harvested honey in July!! Our granddaughters were here and we had the best time. Once we did that, we were hooked. We want to do it again in spite of Jan Paul having to go to ER because of a reaction from multiple stings and losing one of the hives for whatever reason. We have done everything we know possible to overwinter our remaining bees and will start again in the spring. It's a learning curve for sure.

Picture
So.... one of the fruits of our labor is beeswax. FYI, this light and golden color beeswax comes from the frames we harvested honey from. Darker beeswax is typically harvested from what they call brood comb, where the eggs and bees are hatched. No less valuable, it's just a darker color.
Once the frames have been scraped and the honey/wax chunks placed into a filter, the honey drips out and is separated. We have a 5 gallon bucket with a gate at the bottom so we can then release the honey into jars. The remaining wax is washed and melted in water to separate the gunk from the wax. That whole step starts in a large crock pot, using a paint filter to put the rinsed wax chunks in and cheesecloth to keep it above the water as it melts through the mesh. (I tie the cheesecloth to the handles on the crock pot.) You usually have to go through that process at least twice to get the wax clean.

As it hardens in the water, it will release from the sides and form a solid block. You can see two wax disks in the picture, one light and one dark. After hardening, smaller pieces can be broken off and weighed for your recipe.

MAKING LOTION BARS
When I get ready to do the lotion bars, I boil water in the tea kettle first, pouring it into the crock pot, setting it on high. It's heated faster and now ready to melt the wax. I have a designated sauce pan for making lotion bars. This is what I put on top of the crock pot full of hot water. If you are out and about, you might see one at a garage sale and pick it up at a reasonable price. It's also good to have a crock pot designated for your wax type projects.

If no one has ever told you, WAX IS MESSY. I do everything I can to keep from getting wax on the floor or on the countertop. So whatever you do, prepare for that!!

Once the wax has been measured and melted, I add the other softer ingredients to melt all together in the sauce pan. Once all of those are melted together, I will add essential oils. Stir. And then pour into the mold.

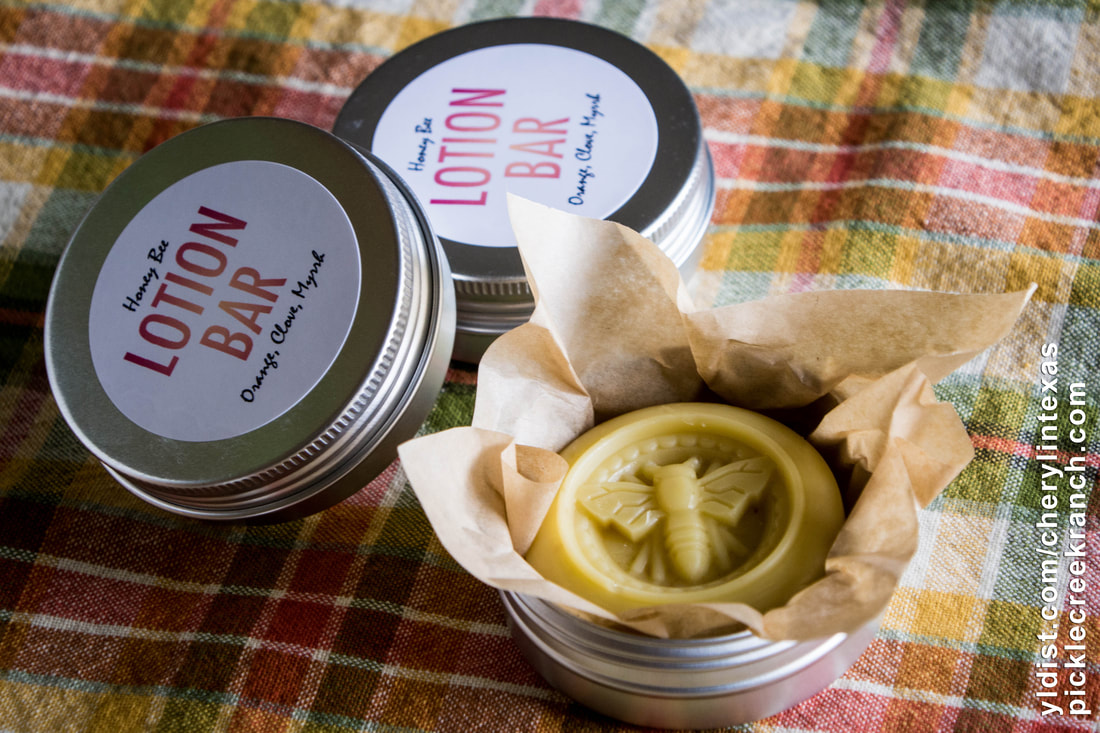
I position this cute bee mold on a foil lined baking sheet because I don't want wax everywhere in case I spill it. Once I fill each mold it doesn't take long for the bars to harden. They can be popped out of the mold, placed on deli paper sheets and tucked into a 2 oz tin that has a screw on lid. I like using the paper and tins. It makes it easier to get the bar out and put back in, especially right after using the bars on my hands. The lotion bar is slightly greasy because of the shea butter and coconut oil, but my hands love it and they NEED it, especially in the winter time!
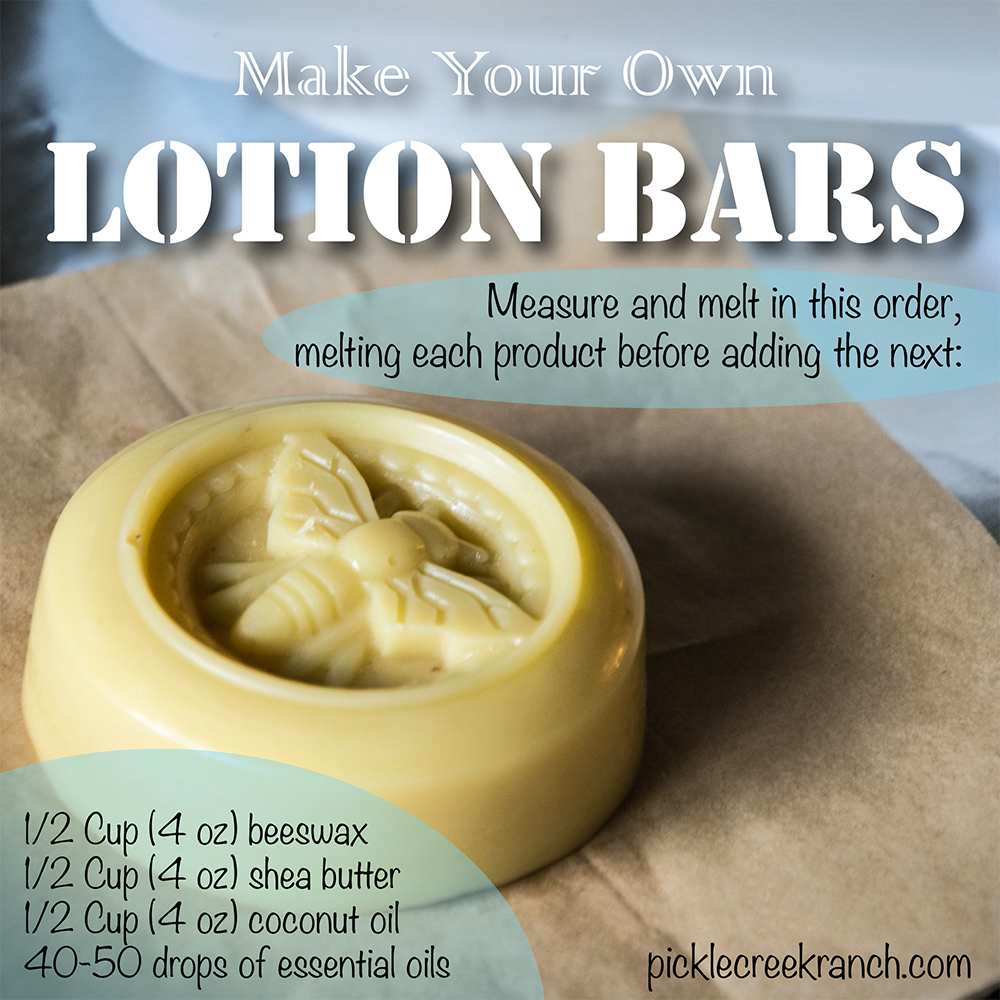
Picture
 INSTRUCTIONS
Measure and melt in this order. melting each product before adding the next:
  • 1/2 Cup (4 oz) beeswax
  • 1/2 Cup (4 oz) shea butter
  • 1/2 Cup (4 oz) coconut oil
  • 40-50 drops of essential oils

Pour into mold, allow to harden, store in a closed container. This recipe should fill your bee mold almost to the top on each one, to make 6. The last time I did it, I was short on the last one so I saved it for myself.

There are many recipes out there but what I found to work well is equal amounts of the three main ingredients that make up the bar. From there, you have variations you can experiment with, like, in place of the shea butter, you could use cocoa butter. You could use use 1/4 C coconut oil and 1/4 C almond oil in place of the 1/2 C coconut oil and so on.

This is the fun part! Choosing your essential oils for blends that you love! I only recommend Young Living essential oils because I know this brand can be trusted. Check out our Seed to Seal Promise and you will understand why.

Try various blends. The 40-50 drops can be a combination of oils such as:
  • 25 orange, 15 clove, 10 myrrh or
  • 10 drops each of orange, patchouli, sandalwood, neroli and myrrh
Mmmmmm! They smell so good.

I hope you enjoy making lotion bars and I'd love to know what variations you use! I have also attached artwork here for you to use on a label. Click on the LOTION BAR graphic to download the label. It's a PNG file so has a transparent background.

Happy Oiling!

Cheryl @ Pickle Creek Ranch
essenty.com/cherylintexas
picklecreekranch.com

Picture
Picture
2 Comments

Body and Foot Soak Made Easy

12/12/2017

3 Comments

 
Picture

Body and Foot Soak Made Easy
by Cheryl L. McClure

Taking a bath or soaking your feet in epsom salts is such a leisurely, relaxing way to end the day and when you add essential oils, it’s even better. Want to know how you can get more out of your essential oils? I have been a recycler/hacker since way back and this is just too good not to share!

There are two ways to use epsom salts and essential oils from your EMPTY bottles! You will end up with a jar or two of epsom salts with all the oils saturated in it. You will also have some awesome, soothing water containing the epsom salts and essential oils you just used to make your salts jars! Plus you will have empty, clean bottles to recycle and use for your own blends, rollerball blends and samples to give to friends. Win Win!
Picture
Try this simple method! 

Start with some epsom salts - just the pure kind with no herbal additives. Then get your empty oil bottles. I only use Young Living essential oils, why? Because they have the Seed to Seal guarantee to be top quality!

Basically, soak all your empty bottles (without the labels) in epsom salts and then you have a wonderful aromatic blend to add to your bath. 

Then, after removing the bottles from epsom salts, soak them in hot water and you have foot soak solution or a liquid epsom salt blend to add to the bath!  


EZ instructions:
For Epsom Salts
All in all, I wound up with a three or four ball jars of salts and 5 or 6 bottles of soaking solution. There is no hard, fast rule to amounts. So however many bottles you have, just fill and cover them with salts and go from there.
Picture
Picture
Picture
Picture
1. Peel the labels off of your bottles and pour a little epsom salts in each bottle. I keep out and save some of the lids with labels on them to use on the new bottles I open. If you are going to soak the lids, take the stickers off.
Picture
Picture
…and umm - don’t take that shortcut! You gotta take those labels off or you will have little bits of metallic and paper flakes in there! Trust me, it's a mess if you do it that way!
2. Submerse all the bottles, stoppers and lids in a jar of epsom salts and let them permeate for about a week or two.
3. After emptying and separating, store epsom salts in a container for the bath. I just realized the container I used for the salts was from a candle I burned wayyyyy back before diffusers!! Haha! I remember that was such a great jar. It was good for storing many things.

For Body or Foot Soak
Follow steps 1, 2 and 3
4. After bottles, lids and stoppers have been emptied, place them in a pot or large bowl. 
5. Boil some water and pour over all the parts. 
6. Let cool and and take parts out to separate for washing.
​7. Pour oily water through a sieve and funnel into swing top bottles. I recycled some from Pumpkin Cider we got at Aldi's! You can also get them on Amazon.
8. Rinse, repeat, and wash with Thieves Dish Soap so you can save for samples or additional blends to make yourself!


To alter the bath salts or water, add specific oils of choice and/or baking soda. 

Picture
Here is a file you can download for labels.  I used it for the 2x2 square labels from Avery.
Picture
I hope you have found this helpful and enjoy your EMPTY bottles of essential oils. You see, essential oils can be economical!

Happy Oiling!
Cheryl @ Pickle Creek Ranch
Young Living Independent Distributor #1176855
essenty.com/cherylintexas/

#diybath #footsoak #bodysoak #epsomsalts #makeyourown #youngliving #aromaticbath #spa #diy #essentialoils 

3 Comments

Fix Your Diffuser

12/12/2017

0 Comments

 
Picture

Fix Your Diffuser
by Cheryl L. McClure

We love our Home Diffuser! Now, it is just like new! So if yours has stopped working, you push the button and it doesn’t come on anymore, try this little trick first! Add a capful of alcohol into the bottom of the diffuser and let sit over night. The next day, empty and rinse out, wiping out excess water, and wiping off the ultrasonic plate. When you turn it upside down, swab the alcohol dampened q-tip into the little holes where the fan is. Get that dust out. Add water to your diffuser to test it out, and if it works, fine! You have more life left in your diffuser! Woo Hoo!! Thanks to one of the readers in YL Hacks on Facebook for bringing this up!

And apparently, I have read that the more we clean our diffusers, the better off they are. My bad. I have not been so diligent!

Anyway, if it still does the same thing - that not coming on, it may be that you need this part. They explain it on their website and it was sooooo EASY to fix! Check out 
www.diffuserdoc.com if you want to extend the life of your diffuser. 
They have additional parts for other diffusers as well. 
Picture
Diffusing Christmas Spirit and Pine now!
Picture
​You can call Young Living (1-800-371-3515 ) and ask if they have an ultrasonic plate replacement for other diffusers, but the last time we checked, there was no replacement for the Home Diffuser. 

Happy Oiling!
Cheryl @ Pickle Creek Ranch
Young Living Independent Distributor #1176855
essenty.com/cherylintexas/


#saveit #replace #fixyourdiffuser #fixit #easy #homediffuser #youngliving #diffuser #ultrasonic #replacement
0 Comments

Throne Scents

8/21/2016

0 Comments


Throne Scents
by Cheryl L. McClure

Picture
I posted my little sticker for Throne Scents a long time ago on Pinterest and I think it's been the most popular pin I've ever had!! LOL

So I thought, hey, why not have a little fun with this and then I'll go on with my life, OK? So... do you really want to talk about this? 

First of all I have to tell you I grew up with three older brothers. Did you? Do you remember the games kids played while growing up, like who can tickle who till they pee their pants? Did anyone ever fart on your head? Maybe that was what did me in!! My older brothers thought it was sooooo funny but I got back at them while running after them with a dirty diaper. I guess I wasn't potty trained by the time I could walk, but how could I be, when boys take so long in the bathroom anyway?


​Which brings me to another point! I remember, being grade school age and up, waiting and pacing in the hallway at home while one of my brothers was in the bathroom and me hollering at him to hurry up!! But once I got in there - O - M - G !! If we only had Throne Scents to spray on the toilet water before going, it could have saved us all. Gah!
Picture
We all just want to smell the roses, right?
So we go on through life and we all have our bodily functions, ok? Nobody wants to aromify everywhere unless it's one of my brothers walking down the isle with me at the store, where they can fart and holler, "Cheryl, why did you do that?" Oh yeah that's fun, especially when you're a teenager!

Sometimes people just have to go and sometimes it's at the most inopportune time! It would be nice to have a little help freshening things up in the bathroom. It would be nice not just for you but for your guest as well. I'm thinking of others here and how we all share the same air.

I have a solution - literally!

This little concoction also makes a great gift for the king or queen in your life, crowning them on their throne! Haha! Make this simple spray with essential oils that will help maintain the pleasant space in your bathroom without using toxic chemicals. It will flat out take care of the odor.

The Throne Scents recipe is not an AIR spray - it goes ON the water. 

Spray 3 or 4 pumps onto the toilet water before going number 2! That's it! Whoever you are sharing this space with will be glad you did, as well as YOU when THEY use it!
Here's what you need:
  • 8 oz. spray bottle
  • 1/2 tsp rubbing alcohol
  • 10 drops Lemongrass Essential Oil
  • 10 drops Grapefruit Essential Oil
  • 10 drops Bergamot Essential Oil
  • Distilled or purified water to fill

Shake and spray!

​After you spray it on the water, the oils will disperse and create a vapor barrier trapping odors! You could try making your own special mix with other oils.
Picture
I used a smaller bottle and calculated the amounts to go in it, so now I can have one in each bathroom. You can find these small bottles at Walmart.
Make Your Own Usable Gag Gift!
Picture
Personalize your magazine with a picture and some fun sayings or a collage.
I made this as a usable gag gift for a friend one time. I had a magazine and I downloaded a picture of him to use on the front of it. Then I actually found a little gold plastic crown at a garage sale that was flat!! It fit perfectly on top of the picture that I had adhered to on the magazine. Glue sticks work great. I also added his birthday and some other verbiage on the front. It was really funny. Now, he had his own magazine (all about him) to read while he was sitting on his throne! Haha!
I hope you try Throne Scents and see how well it works. I'd love to know what other combinations, you used that you liked.

Happy Oiling!
Cheryl @ Pickle Creek Ranch

Independent Distributor 1176855

#smellgood #breathe #bathroomhelp 

P.S.  Thieves Spray is great to have on hand for your air space, even in a vehicle! 
 See my story! It's my story and I'm sticking to it!
This post was shared on The Homesteader Hop
0 Comments
    Picture

    Cheryl L. McClure

    Young Living Distributor
    #1176855

    I have retired from the corporate world and now enjoy keeping chickens, ducks, working in the garden and cooking more than ever before!

    More below...

    Categories

    All
    Art
    Bathroom
    Birds
    Butterflies
    Cats
    Chickens
    Cleaning
    Community
    Cooking
    Decor
    Diy
    Ducks
    Edible Landscape
    Essential Oils
    Fire Starters
    Free
    Gardening
    Healthy
    How To
    Instant Pot
    Local
    Make Your Own
    Nature
    NETT
    Rainwater
    Ranch
    Savings
    Tools
    Travel
    Volunteering
    Young Living


    ​Blog Posts:
    PV Assistant
    Malabar Spinach
    ​Throne Scents
    Clean House
    Shrimp
    Weight Management
    Black Swallowtail
    Gluten Free Brownies
    Mint Tea
    Hummingbirds
    Minty Cabbage Slaw
    Respiratory Support #1
    Respiratory Support #2
    Respiratory Support #3
    How to Move a Greenhouse
    ​But I'm So Cute!
    Raised Bed Gardening
    NETT Cleanup
    Exercise at the Ranch
    DIY Chicken Treats
    DIY Fire Starters
    Poblano Pepper Powder
    Green Tomato Weekend
    MYO Nitey Nite EO rollon
    Essential Oils and Chickens
    ​Diffusing Essential Oils
    Longhorns at the Pound?
    What's in your Trough?
    Using Rainwater at the Ranch
    Raindrop with Young Living
    Young Living Price Comparison
    Young Living - Beginner Tips
    The Essential Oil Bottle 
    Sage Essential Oil
    Ear Support and EOs
    Crape Myrtle Surprise
    Quick Cat Shelter
    Chemists's Perspective on YL
    The Athlete
    Chicken House Reveal
    Campus Health
    Concentration
    Accidents and Essential Oils
    Young Living Farms
    Kid Scents Collection
    Itchy Skin
    ​Probiotic - Life 9
    Turmeric and AgilEase
    Enjoying the Harvest
    ​
    Diffusing the Ocean Breeze
    The Lavender Farm
    An Ounce of Prevention
    Traveling with Essential Oils
    The North Sulphur River
    DIY Bleach
    Reflection of Tears
    ​MYO Lotion Bars - DIY
    Zucchini Boats
    Instant Pot Cilantro and Lime Rice
    Instant Pot Zuppa Toscana Soup
    Fresh Guacamole Please!
    Instant Pot Tomato Sauce
    Honey Lavender Lemonade
    Honey Lav/Lemon Ice Cubes
    Tools For The Garden
    Veggie Tian from the Garden

    Archives

    November 2024
    August 2024
    May 2024
    April 2023
    December 2022
    July 2022
    June 2022
    March 2021
    January 2021
    November 2020
    September 2020
    August 2020
    July 2020
    May 2020
    February 2020
    August 2019
    March 2019
    January 2019
    May 2018
    February 2018
    December 2017
    August 2017
    July 2017
    June 2017
    May 2017
    February 2017
    January 2017
    October 2016
    August 2016
    July 2016
    June 2016
    May 2016
    April 2016
    March 2016
    February 2016
    January 2016
    November 2015
    September 2015
    July 2015
    February 2015
    January 2015
    November 2014
    October 2014
    September 2014
    August 2014
    July 2014
    June 2014

    CONTACT INFO
    It's probably pretty obvious I love nature and art. Nature and landscape photography is a part of everyday life at the ranch. There are some pieces available as works of art that I would like to share with you!

    I only recommend Young Living essential oils because I am confident in their purity and the quality of their essential oils and other products. I am not a doctor. The information I post on this website is for educational purposes only. Young Living supplements are designed to improve nutrition; they are not intended to diagnose, treat, cure, or prevent any disease. However, scientific research has established a connection between nutrition and we all know better nutrition leads to better health.

    Please consult with the medical professional of your choice whether using essential oils or not. Remember that being proactive and taking responsibility for your health is in your own best interest. Dig in, research and make wise choices. I encourage you to see what others have done with essential oils and supplements by visiting Oil-Testimonials at http://www.oil-testimonials.com/.

    I hope that this website and blog will provide you with helpful information and resources to achieve your desired goals!!
    ​
    Feel free to contact me if you have questions or concerns as I am here to help and hopefully point you in the right direction!​

    RSS Feed

    Go to> • Home • Cheryl In Texas Art • Photography •  Essential Oils • The Ranch • Blog
Web Hosting by iPage
All photography and graphics crafted by Cheryl L. McClure • does not include iPage template